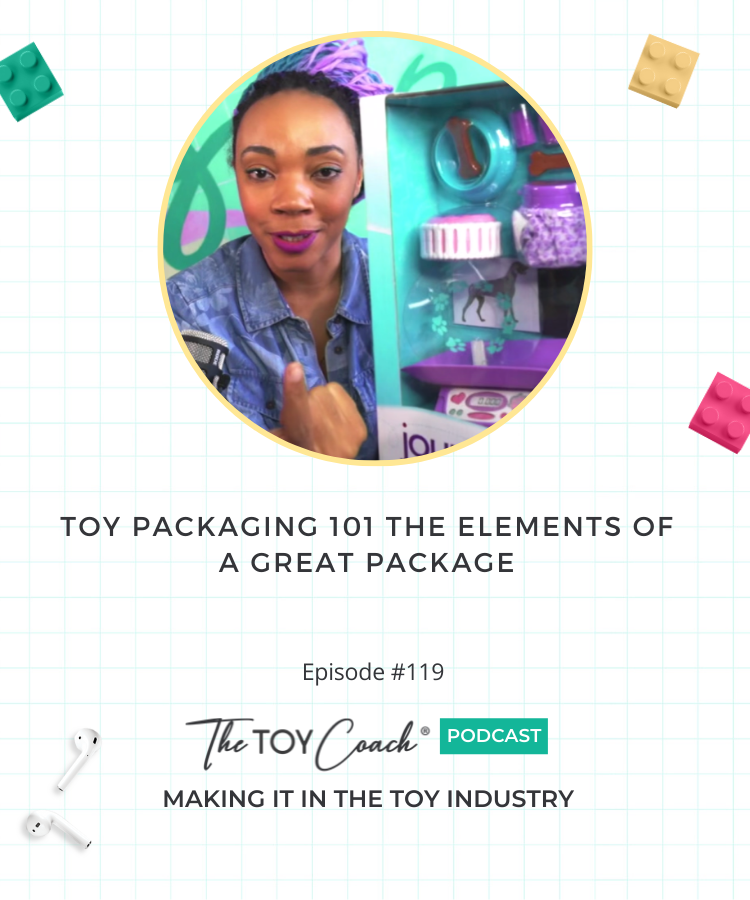
Episode #119: Toy Packaging 101 The Elements of A Great Package
Listen Now
Tap Play Below or Listen On iTunes | Spotify | Google Podcasts
Are you struggling with developing the perfect package for your toy or game product? As toy or game creators you spend a lot of time thinking about the amazing toy idea you have and the innovative game that you will create, but you likely don’t spend nearly enough time thinking about the packaging of your toy or game idea. Well today that changes! It’s time to learn toy and game packaging 101 with The Toy Coach.
By The End Of today’s Episode You will know the anatomy of great toy and game packaging. This episode will teach you the 5 different sides of toy and game packages and what the purpose of each side is. You can have a clear understanding of what is essential on ALL great toy and game packages, and what is simply a luxury add on. If you're ready to improve your toy or game package for retail sales, then this is a podcast episode that you simply cannot miss.
EPISODE CLIFF NOTES
Learn the the 5 sides of a toy or game package
Find out the most important element of a front panel of a box
Discover the money making difference between side panels and bottom panels of packages
Do you know the difference between a beauty shot and a lifestyle shot? Find out which is more expensive and why!
Find out how to improve the likelihood a potential customer will purchase your product by 50%
Learn the one lesson that changed the way The Toy Coach approached packaging and product design through her entire career.
Find out why an when QR codes are useful on packaging
Discover what packaging windows replace
-
This episode is brought to you by www.thetoycoach.com
-
[00:00:00] Azhelle Wade: You are listening to making it in the toy industry episode number 119.
[00:00:06] Hey there toy people Azhelle Wade here and welcome back to another episode of the toy coach podcast, making it in the toy industry. This is a weekly podcast brought to you by thetoycoach.com. Today's podcast episode is one that I'm surprised I haven't touched on the show yet. Considering I spent a huge portion of my toy career developing, not just products, but the packages that surround them. As toy or game creators, you spend a lot of time thinking about the product that you will create, but unless you have a marketing mind or an interest in graphic design, you likely don't spend enough time thinking about the packaging of your toy or game.
[00:01:07] So for today's episode, we're going to do a little bit of a 1 0 1 on toy and game packaging. And I'm calling this lesson, the anatomy of a great toy or game package. If you want an extended version of this lesson with visuals to support what you're hearing, then I want you to check out Toy Creators Academy because what I am teaching today is just a small piece of the giant feast that is that program. So if you love what you learn today, I want you to head on over to toy creators, academy.com and get yourself all signed up on the wait list so that I can notify you when the course is available for enrollment again.
[00:01:52] We are soon going to be offering a self-study version of toy creators academy and a version where you can work with me directly while you're working through the materials. So make sure to get on that wait list. So you don't miss out on any of the announcements. Now by the end of today's episode, you, my friend are going to know the anatomy of a great toy and game package. You'll have a better understanding of what elements or parts are included and essential on all packages. And finally, we're going to cover a few elements that are sometimes left out and why.
[00:02:32] You know, I love to get into the why, because in that why is where we find the understanding that will allow us to implement what we learned here today and improve what we do. But before we get into all of that, I want to start with, you've guessed it a definition. And we're going to start with a definition of packaging. What is packaging? What is the purpose of it? Is it still important? Because so much of our shopping happens online. Can packaging still achieve what we want it too. Well, yes, I believe that it can, and that is still, is extremely important for us to understand what makes up a great package for retail, even though so much shopping is happening on line.
[00:03:20] So first, what is the definition of a package? Well, a package serves many different functions for a product, it is the piece that holds the product. It serves a practical purpose of being able to help the product be stored, transported and handled. But it also serves the purpose of selling a product. A package is essentially a billboard, but while it's a billboard, it also facilitates the actual process of selling a product with a use of the barcode that is included on a package. Now, without further ado, I want to dive right in to a conversation about what makes a great toy or game package.
[00:04:05] Now, back in my college days before even toy designed before a study toy design, I read a book that changed the way I viewed product packaging. The book was called why we buy the science of shopping. And it's a fantastic book with one lesson in particular really changed the way that I thought about product development, packaging, and even marketing for years to come. And why we buy as a book by Paco Underhill in which he shares 20 plus years of experience observing some 50,000 to 70,000 shops a year in stores, banks, and public offices.
[00:04:48] Now the lesson that influenced my design decisions and product development decisions for years to come was this. When a shopper picks up a product in a store, their likelihood of making an unplanned purchase increases by, I believe it was 50% or more. Now I learned that shopping is a sensory experience and touch is a highly important element of that experiential decision-making process. And why is that? Well, because even you as a shopper, as soon as a product is in your hand, you have begun the process of even if it's in the back of your mind, the process of owning it.
[00:05:39] And that process of just paying for the product becomes merely a technicality that the retailer has to help facilitate. Once you're holding it, that idea that you already own it is already happening even in your subconscious. So that idea that touch is so important to the sale of products. Made me more aware of how my perception and feeling of a product changed in a store once I touched it. And once I got into the toy industry, I started noticing when that process of touching a product made me want to take it home. I noticed what made me inclined to touch a toy product to use the Try Me features.
[00:06:31] I would notice this through all of my toy trend research trips. And because of that, I would go on to design and propose Try Me features with more of my toy and game ideas than probably needed it because I wanted to give the user a reason and excuse to engage or touch that product in the store. Now before we can get into the anatomy of a package, we've got to understand the purpose of a toy package. What is the purpose or function of a toy or game package? Well, first thing it's to hold and protect the product for efficient and safe transportation from the factory to the retailer, to the consumer's home, right?
[00:07:18] Now the second job is to communicate the features and the function of the product to communicate to the retailer in a way that determines what aisle or category the product should live in. But then also to communicate to the consumer about various features of the product details about the brand that makes it. Now another important function of a package is to facilitate sales. Now, overall, a package should be designed to simplify and facilitate the selling of an actual product overall. And so to make sure that you're doing the best job of facilitating a sale of your toy or game product.
[00:07:59] I want you to know and I want you to be able to utilize all of the most important parts of a toy or game package. So let's dive into it, the anatomy of a toy and game package. To understand the anatomy of a toy and game package. I think you first need to be very aware of all the sides of a package. So if you happen to be at home while listening to this episode, I want to encourage you to either pick up a toy or game box that you might have lying around your house or Google your favorite modern toy or game on a retail site like walmart.com or target.com and take a look at the packaging as we go through this episode.
[00:08:44] You can pause this podcast right here and start it back up again when you are ready with your toy, your game sample, or you're ready with your Googled toy or game online. Okay. And then let's pick right back up and continue. Now, the first thing you've got to know are all of the important sides of a package. So a standard toy or game package, really a standard package of any kind is labeled and separated by panel. So there is a front panel. There is a back panel, a bottom panel, a top panel and side panel. Now the word panel just refers to a certain face of the box.
[00:09:26] So the front panel is means the same thing as the front of the box. The side panel means the same thing as the side of the box, the back panel of the same thing as the back of the box and so on and so for. Now each panel of a package has a different job. Now the front panel is the most important panel in any toy or game package. And it has the biggest job. The job of the front panel is to catch the eye of the customer it's to explain the product and to encourage closer inspection. So let's talk about what makes up the front panel of a box. And I want to do this in the order of importance. So the first one we talk about is going to be the most important.
[00:10:12] Now, number one, the most important element on the front panel of a box is the product image or product window. Now the largest part of a toy or a game package is typically of the product itself. It's either a high resolution image of the product, or it's a window that shows the actual product placed inside the box. If a product image is used, there's two types of imagery that you can choose for your toy or game.. So the first option is a lifestyle image that shows your product in use by the people or person of the age range that it was intended for. So this could be an image of a family playing a game or a single child playing with a product like a doll.
[00:11:03] Now, sometimes this image is a real photo of your product in use like a photo from a photo shoot, but more often than you would expect toy companies actually Photoshop fake products in the hands of Shutterstock models. Now I've been on trend research trips and seen the same model that I've used and photo-shopped on a package holding or wearing a toy product that was created on a competitor's package, holding or wearing the competitor's product. It's true. Photo shoots can be expensive and they can be time-consuming. So sometimes toy companies that are pushing out a lot of product in a really limited amount of time, have no other choice, but to opt for Photoshopping images of their product with Shutterstock models in order to make certain printing or shipping deadlines.
[00:12:00] Now it's not ideal, but it does happen. So it's great to know that if you are in a situation where you really can't afford a full on photo shoot, that you can potentially opt for Photoshopping, a Shutterstock model, awaring, or holding or presenting your product in some way, as long as you can make it realistic. But if you're in a situation where you really can't afford to hold a photo shoot, and you can't even afford to buy a model image from Shutterstock, there is another option. So there's another option for this very important element of your package. And that is to feature a large beauty shot of your toy or game product.
[00:12:41] Now a beauty shot is just your product by itself with no other people in the shot at all. Typically a beauty shot is taken on a white backdrop or some other really simple muted service. So that the backdrop can easily be removed or otherwise manipulated. The beauty of having beauty shots is that they allow you to really blow up the product image as big as possible on your package so that the customer, seeing your package at retail can see all of the details. Lifestyle images can be tricky because you have to balance the size of your toy to the size of the model and the size of the package. So you might end up struggling with showing enough of the model or models to show context as to what they're doing on the package, but still showing your toy or your game large enough on the package.
[00:13:40] So that customer looking at the box in store can see what that toy game is. Because in reality, you want to show off as little of the model as possible and as much of your product as possible, but sometimes that's where using lifestyle images gets tricky because you might have a very small toy and trying to show a small toy in the hands of are being interacted with, by a child or an adult. Is just difficult or sometimes impossible to execute on a package. Now the second important part or element of a great toy or game package is going to be your product name or your brand name.
[00:14:24] Now, usually your brand name is placed in the upper third of the package. And if present the product name will then be simpler, easy to read text that matches the brand's design. And that product name could either be right next to that brand logo or brand name, but that product name could also be at the base of the package itself. Sometimes it floats around. It really depends on the brand where that product name will live. Now, sometimes the product name and the brand name are one in the same, but most often they are not. Your product name is typically more descriptive and really specifies what exactly is in the box.
[00:15:10] Whereas your brand name might be more recognizable to the consumer. It might have your logo might be your logo and it's more definable as to the category of the toy. Definitely more stylized. Example of this is the brand cry babies, right? This is a toy product. You don't know what it is. You can Google it. But the brand cry babies, they have their brand name, cry babies as the big front and center texts on the front panel of their box. But the full product name you can see is Missy. So it might be the full product name might actually be cry babies missy. And Missy specifies the exact doll type that this cry baby is.
[00:15:57] So cry babies the brand is more notable for consumers, so that will be larger and more centered on the package. Whereas this specific product details like Missy, which is one of the dolls names is smaller and to the right of that branding. You want your brand name to be easy to read from a distance of about three feet, if possible, think about the width of an aisle in a store. And since that brand name might actually be your logo, that's going back to thinking about the simplification of your logo design, but also just the size of it. You want to make it big enough that it can be seen from a little bit of a distance.
[00:16:37] Then when you think about your product name, it really helps if it's an easy to read font as well, it won't be as, quite as big as that brand name. And you want to make sure that you don't have any other shapes or overlaying any other images underneath that product name or even the brand name you want to make sure these are very visible and super easy to read. The product name can be smaller as I said, from the brand name, just make sure you're designing it, that it can be legible at about one to one and a half feet away. If someone is standing one-on-one and a half feet away, they should be able to read that product name. And if they're about three feet away, then that's when you want them to be able to read that brand name.
[00:17:23] Now, again, there are some times where the product name and the brand name are one in the same, but asI said typically they are not typically it's one, a brand name for a company that has multiple products and the products all have different product names. Now the third, most important part of a great toy or game package on the front panel is the tagline or the call-outs. So game packages typically have what is called a tag line while toy packages have what's called call-outs or a call-out. This important part of a toy or game package quickly explains to a consumer who might have like a Tik Tok like attention span the main benefits of a toy or a game product.
[00:18:12] Now in the game, dragon snacks, the tagline is can you steal his snacks? And that tagline tells you what that game is all about in a short, concise mini sentence. A toy product example of that would be the AirHogs package. So the AirHogs package has a call-out that says flies up to 50 feet in the air. And that call out tells the consumer some of the most interesting wow factor elements of the toy product, whereas in the game world instead of focusing so much on the wow factor of a game, you're focusing more on what is the wow or exciting portion of the game play. Okay, next, the fourth important part of a great toy or game package is the inset images.
[00:19:06] The inset images are supplemental images of your product that are typically placed at the lower right or lower left corner of this front panel of a toy or game package. But that placement, again, really depends on the layout of your overall brand style guide and your package in particular. Now inset images are typically bound within a defined shape. So it might be bound within a circle shape or a square shape. And the purpose of these inset images is to show something that you decided not to show or could not fit in your main beauty shot of your product.
[00:19:46] So an example of this would be, if you decided that you just couldn't have a lifestyle image on the front panel of your box, you want it to, but it just wasn't ideal because it looked like your package would mostly be focused on the child playing with your toy and not the toy itself. So you opted to just have a beauty shot of the toy product alone. Well, that's where your inset image comes in. That's where your inset image allows you to do. Feature that lifestyle image in a smaller area on the package, but still get the benefit of showing the consumer someone like them that is engaging with this product. Now packages can have multiple inset images.
[00:20:29] Usually the more complicated the features of the toy or game, the more inset images the package will have. Sometimes these inset images can literally be used. Steps. So if a product has steps to reveal a magic reveal, then the inset images will be used to show the consumer step one, you do this. Step two, you do that. And step three, there's a magic review. But you definitely don't want to have more than three insets because there is a lot of valuable real estate here on the front panel of the package. And you will need that space for other parts, but also you don't want to overwhelm your consumer.
[00:21:08] You don't want to give them too much information that they end up taking none of it in. So you do want to limit your use of these call-outs to just three per package. Now the fifth important part of your toy or game package on the front panel will be your company and legal information. So this includes your company logo, the age grade of your product. This includes safety warnings that you might be required to put on the package. Now, typically toy companies reserve a nice big chunky bar space at the bottom of the front panel for some of this packaging information, depending on the popularity of your company's brand name or your company's logo.
[00:21:51] You may actually choose to move your logo away from the bottom portion of this front panel and put it in the top left, in more notable position because you know that your brand might carry a lot of weight to your consumer and mean a lot for them to see it on the package. Now the bar of information of company info, legal info, age grade it could include a three-plus warning if that's required for your product. It could also include the weight of some of the materials included in your box. It could include the quantity of players required for a game. Or a variety of other product information that might be required depending on the region that you're selling your product in and the age grading and contents included as well as just your company specific standards for packaging.
[00:22:43] Companies often add on their own standards for packaging in addition to whatever safety labeling requirements there are for that specific region. And they do that just to be extra safe and to have some consistency among all of the products of their company. If you want to learn more about toy safety standards, I would love to invite you to listen to episode 43 of this podcast called Toy Safety 101, just head over to thetoycoach.com/43 when you're done with this episode. Of course. But that will take you right to the toy safety app. Okay, let's move on to the back panel of the box as I told you before, we're going through all of the panels of a great toy or game package. So what is included in that back panel of your box and why is it so important?
[00:23:35] Well, the job of the back panel of a toy or game box is to provide greater detail on what's included? What's inside? The idea when designing an effective back panel of a box is that in a retail setting, a customer is clearly very interested in your product. If they've picked it up, flipped it over. And that means they're just looking for this last bit of information and encouragement that they're making the right decision to purchase. So on the back panel, you don't want to add information that will raise more questions. Instead, you want to give answers to any and all questions that you might predict the customer will have at this point.
[00:24:19] So let's go over all of the important parts of a back panel of a or game box in order of importance. Number one, the most important part of a back panel of a great toy or game box is the contents image. The contents image is like the beauty shot of the back of the box. This is where you show all of the contents of what is actually included with your product. So for craft kids, content shots are taken on tabletop set to look like busy craft desks, belonging to the ideal target consumer of that product, but for toys and all other types of toys and games, oftentimes content shots are done on a plain white backdrops so that the background can be photo-shopped out if needed.
[00:25:14] And the contents can be manipulated with graphics added around them, or even behind them. For family-centered toy products these content shots are usually images of a family playing with the toy or a game. Now that could mean a family sitting at a table playing with a dough kit. Or a game in action on a floor with a family around the game. When used on the back of the box, usually these images are intentionally chosen to show the details of what's included, not just the lifestyle play, not just users using the product in action, but also showing all of the contents that are included. The details that are highlighted in these images are the game pieces or the cards or the toy pieces that are included.
[00:26:08] Now the second most important part of the back panel of the box is a written list of what contents are included. Having worked on craft products for a big chunk of my career, the what's included list on the backs of packages have caused me so much stress over the years. The what's included list needs to match your product exactly. If there is a craft in your product, that means you've got to list the length of yarn. If there's any included in that craft kit, you'll have to include the weight of glitter. Even the quantity of stickers. If your product is a toy, it means listing the intentionally separate parts of the toy.
[00:26:52] These, the accessories, the remote controls that might be included, and even the instruction sheet. If you incorrectly list the contents on the back of your box, you are almost guaranteed to get either confused or frustrated calls from customers who want to know where their extra yard of thread is or where they're missing toy accessories is. So it's important that if you make any adjustments to your product in the process of product development, if you take away any pieces, stickers, workbooks, or parts from the toy that you update, the what's included list on the back of the box to match, what's actually included in the box.
[00:27:37] Now the third, most important part of the back of a box is the product description or brand story. So with toys and games, this is usually where a company will either provide a more detailed description of the product itself. Or share the mission of the brand overall. So it's usually not both, it's usually one or the other, but if your customer is evaluating the back of a box to the except where they actually read this extended text information, this product information, or this brand story, then it's because they need to feel more connected to your product or brand before making that purchasing decision.
[00:28:19] So they're likely looking to see if this product is truly going to do what they think it will do, whether that's help teach there's child stem or keep their family laughing all night long through game night. And they also may be reading to learn more about the company who makes the product. And this is where you could sway a potential customer with your personal brand story. Now you can choose to have a product description or a brand story. You do not need to have a, both on the back of your box. Most of the time, you will only have space for one. Again, we don't want to make the back of the box crowded or difficult to read or give too much for them to do.
[00:29:05] Now, deciding on which you'll use, whether you go for product description or brand story, really depends on the notoriety of your brand. It depends on how well your brand story connects to your ideal target market or how easy or difficult your product is to understand. If it's difficult to understand your product from the front panel, graphics and imagery, you might need that back panel to do that in a product description. Now the fourth, most important part of the back of your toy game box is your company information.
[00:29:43] I mentioned earlier that the logo of your company could go on the frontier box, but some companies do to lack of spacing or lack of brand awareness or a lack of cohesiveness from the main company brand to the product brand. Some of companies might choose to move their logo to the back panel of the box. So whether or not you choose to put your logo here, the back of the box is also usually where companies place a website or feature a QR code, because these are both tools that may help an indecisive customer make a decision on a particular product. Sometimes you'll see barcodes here, but more often they're on the bottom panel, which we'll be getting to in a few minutes.
[00:30:33] Now the overall goal of the back of your box is to answer questions that your customer might have. So if they're looking at the back of your box, remember most likely they are your ideal target audience. You've almost got them. You've just got to convince them that your company and this product are the best option for whatever it is they're looking for. That is the main job of this back panel. Next, let's talk about the side panels of a great toy or game box. Now, typically this is the left and the right side panels have a box and they're usually identical. And if they're not identical, there are very similar. Maybe just mirrored.
[00:31:15] Most of the time toy packages are placed on shelves with their front panels facing out. That's how they're meant to be placed. However, there are times where you will see at smaller toy store. Product is just packed in such a way that the spine or the side panels of the product are facing outward, or you might even see at major retailers product in stores just gets messed up by the consumer as they touch it and move around various boxes. And another consumer might come by and instead of seeing the front panel, see the side panel. So it's important that your side panel does a good job of explaining what the product is just in case it happens to be the first thing that a customer sees.
[00:32:02] Now there's really no hard and fast rule of what you must or you shouldn't include on the side panel of your box. Sometimes side panels are literally just graphic designs with no product information at all. Other times, side panels are used to focus on showing the contents of what's included in the box. In my opinion, the most important parts to include in a side panel whenever possible are the brand name or the product name. And the second most important thing to include is that inset shot. With that brand name and that product name, you get an idea of what the product is. And typically that inset shot gives us enough insight to peak the customer, to either pick it up and look at the front panel, or just give a closer look to that side panel.
[00:32:52] Finally, let's move on to the top and bottom panels of the package. The top and bottom panels of a package are also part of the side panels. They are also on the side but they are a little bit different in what you feature on the top and bottom panels. Now the top panel of packaging oftentimes is really simple. It will just contain a brand name, which might be your logo on a different color background for some contrast on your package. Some packages don't actually have a top panel at all, just because of the design of the package and the shape of the package, but we won't get into all of that different types of details of packaging shapes just yet on this episode. That a whole other podcast episode for another day.
[00:33:44] Now the bottom panel of a package is pretty important however. The bottom panel of a toy or game package typically has a lot of legal information about the manufactured sure. Of the product the color or content disclaimers for the product will be there. The contact information for the manufacturer or the support or concerns, email or phone number will be there. The bar code will be there. And also that's where you're going to find the style numbers of a particular product. Now, all the information I mentioned is usually required info and it's all equally as important. So there's not a whole lot of higher hierarchy happening on that bottom panel.
[00:34:31] However, there is one piece of information that just trumps all that. The most important piece by far would be the bar code. The reason that barcode is so important is because, you know, that's how you sell your product. You want the barcode to be the largest piece here because you want it to be easily found and able to be scanned by the cashier. When your customer is ready to purchase, you definitely don't want them looking for a barcode thinking it's not there and being confused. You want to remove all roadblocks. For that a customer might have right before purchasing your products. So an easy to find barcode is one major roadblock that you have complete control over.
[00:35:12] One little tip to think about when you are having someone design your packages, or if you are designing your packages, yourself is really that barcode placement, all packages are designed differently. They don't all fold clothes the same way. And because of that, the placement of the barcode is going to vary. Even if you want it to show up on the bottom panel, you might actually place it on, in a spot that might seem like it's going to end up at the top panel of your package. But once your package is all folded up, it will actually end up with bottom panel. And I just want you to pay attention to where you have someone placing your barcode and make sure you're testing your package before you go to production.
[00:36:03] Because I have seen where a barcode is placed in the wrong spot, on a package. And then when it went to production, that barcode was actually not visible once the box was completely folded up, which resulted in additional charges to add stickers on the completed package of the barcode. So that is just a major newbie mistake that you can now avoid because, you know, to avoid them. Now the second most important piece of information for this bottom panel, have a great toy or game package it's really just everything else. That's the company information, the contact info product number disclaimers that you might have to have. And all of that is typically around the same sizing. It's really small font, size 10, sometimes smaller.
[00:37:00] It's all equally as important. There are some companies that make their contact info or customer service information very easy to find by highlighting it with a different color underneath that text, because they want to make sure that any unhappy customers know exactly where to find them before making public complaints. But really the bottom panel, all that information is equally as important. And don't typically have to play around with the hierarchy of the images or texts so much other than that barcode. Now to wrap up this conversation today, I just wanted to talk about some bonus packaging elements that are not always included. Sometimes they are, and sometimes they're left out.
[00:37:43] The different parts of a toy and game package that we covered today are typically, always present in most toy and game packages. But there are some elements that companies add in additionally, or they swap out for some of these other elements. So really quickly, let's go over, try me feature, product windows, QR codes, and print efects. First up, try me features. Now, earlier I mentioned the book, why we buy that taught me the importance of getting a potential customer to pick up your product. Now, one great way to increase the likelihood of that happening is to incorporate what's called a try me feature. Now try me features or when toy packages have a hole or an opening that encourages the customer to press a button that will activate the toy.
[00:38:34] Try me features can also be focused on a tactile sense, encouraging the customer to touch a toy product or package, just to feel how soft it is or to turn a wheel or a crank. When a try me feature is put into a package, it typically takes the place of an inset or a call-out image. So it's swapped and used instead of those. Now next, I just want to cover a window. A window in a package is when there is just a large opening in the front panel of a box to show the actual product that's inside the box. Sometimes the window opening is sealed with an acetate cover so that the product can't be touched or stolen, but sometimes there is no acetate cover and the product is secured with something that's similar to zip tie.
[00:39:28] Now if a toy package has a large window and I'm talking like an 80% open front panel, that window is typically used in place of a beauty shot. So instead of a beauty shot, now, there still may be inset shots of the product around that window. But usually that window opening is the main shot of the product. So the company would take very good care in how all of the components are laid out in that window.
[00:40:00] So if it's one big toy piece. It's just the company will take care in making sure that piece is secured in place. If the window is going to be completely open with no take cover. And if it is a assortment of pieces that have to be laid out with great care, a company will use what's called a vac tray or a double vac tray to hold all of the pieces in place to look a certain way. Next, I want to talk about QR codes. So QR codes are often used on the front and back of boxes to showcase how to play a game or even highlight the reviews of a toy. Customers are encouraged to scan the code, to learn more about the product in an attempt to encourage a purchase. So QR codes are used in addition to all of the standard elements or parts of a product package that we talked about earlier, but currently don't replace any elements.
[00:40:57] They still are used in addition to existing packaging element. Now, the last thing I want to cover is print effects. So print effects are something that, you know, I love playing with to create visual interest and tactile interest on a packaging box. They cost a little bit extra, sometimes a lot extra, but you can combine things like matte print effects with metallic foil effects or glossy print colors with embossed print effects to create a package that is as fun to touch as it is to look at. Print effects are also used in addition to other packaging elements that we covered in this episode, they're not used to replace any one element, but they can enhance them.
[00:41:47] And they're great for encouraging people to touch the package and touch the product which as we discussed earlier is very important. If we want to increase their rate of sale. Now, before I dive into my conclusion of today's episode, I want to give a listener, shout out. Today's listener shout out goes to Marie Hecuba, and I'm going to share with you Marie's review for this podcast from apple podcast. Marie says, thank you Azhelle for becoming a huge force in my life. I love your podcast and listen every morning. I will see you when my amazing book gets published. See you at the top. Also a huge shout out to Marie Forleo for introducing us. Marie, thank you so much for taking that time to leave a review. And I hope that you hear your name tomorrow morning on the podcast.
[00:42:38] If you love this podcast and you haven't already left a review. What are you waiting for? Your reviews mean so much to me, I get a notification on my phone. Every time a new one comes through, puts a huge smile on my face. So I would love, love, love for you to leave a review wherever you listen to this podcast. Okay. Let's recap what we covered in today's episode. So we talk about the anatomy of a package. You now know there are many different sides of a package front panel, back panel, side panel, top panel, bottom panel. And you know what's important on each of those panels to highlight. So let's recap the five important parts of that front panel.
[00:43:23] Number one, we had that beauty shot or that lifestyle image. Number two, we had that brand name or product name. Number three, we had that tagline or call out. Number four, the inset images. And number five company and legal information. Then we moved over to the back panel packaging and we learned number one, we want to have that contents image. Number two, we want to have that written list of what the contents are. Number three, the most important part of the back of that box, we wanted to have that product description or brand story. And number four, our company information. And then we went over and learned about that side panel of the box that the most important thing to include on that side panel is the brand name and or the product name.
[00:44:15] And the second most important thing would be the inset shot. Then we moved over to the top and bottom panel and we learned the top panel is pretty simple. We just needed that brand name on there, but the bottom panel is the most important because that is where we're going to have our bar code so that a customer can actually purchase our product. But it's also where we're going to have information about the company, the manufacturer of the product. We might have some disclaimers, their contact information, product style number. We do not want to forget anything in the all-important bottom panel. Okay. So now you have some homework to do my friend, your action item for next week is to do this.
[00:45:00] I want you to go to a toy store. I want you to pick up a toy or game package, and I want you to take a picture of you with whatever side of that box you like the most. Posted on Instagram. In your stories tag me. And tell me one of the elements that you notice in that picture that you took, what element do you think that company did so great on? Was it the beauty shot? Was it the brand name? Is it the tagline? What stands out to you most? You just have to do one panel bonus points. If you do more. And I would love to share the images. So make sure you tag me when you post it to your stories. As always, thank you so much for spending this time with me today. I know your time is valuable and that there are a ton of podcasts out there. So it means the world to me that you tune into this one. Until next week, I'll see you later toy people.
-
🎓Learn more about how you can develop and pitch your toy idea with Toy Creators Academy® by clicking here to visit toycreatorsacademy.com and join the waitlist.
Not ready for the Toy Creators Academy online course? Start by connecting with fellow toy creators inside our online community. Click here to join.